- Home
- Beginners
- Beginner Patterns
- Crochet Techniques
- Crochet Stitches
- Textured Stitches
- Crochet Edgings
- Granny Squares
- Baby Crochet
- Bags and Purses
- Crochet Headwear
- Accessories
- Patterns For Download
- Unusual Crochet
- Your Creations
- Shopping
- Contact Us
- Updates
- Privacy Policy
- Income from your hobby
- Competitions
- Twiddlemuffs
- Crochet Business
- Free Crochet Patterns
- Crochet Scarves
- Fluffy Yarn
- Extreme Crochet
- Crochet for the home
How to Crochet a Curlicue Edging
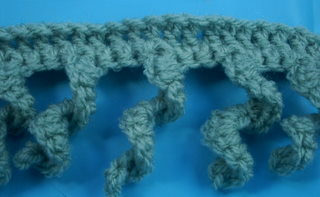
A curlicue is very easy to crochet and very decorative. These delightful corkscrew curls can be used as an edging or bunched together as a tassel.
Below you will find instructions for making a basic edging or fringing, which can be used for such projects as blankets or ponchos
Instructions are given using UK terminology with the US equivalent in brackets
It works best if you work your edging on a foundation row of double crochet (US single crochet) or other firm straight edged stitch, but I also think there should be no hard and fast rules for anything creative, otherwise new ideas are never discovered. So experiment
You can even use curlicues to make hats and wigs (!!!)
And what's really sweet is a tiny octopus made for premature babies because the curlicue resembles an umbilical cord
Abbreviations
dc = double crochet (US single crochet)
ch = chain
sts = stitches
st = stitch.
Instructions
After finishing your foundation row, make 1ch and turn.
Work 1dc into each of first 2 sts
*Make 10ch
Work 3dc into 2nd chain from hook
Work 3dc into each of remaining 8ch**
From * to ** is one curl
Next:
*** Work 1dc into each of next 4 sts of your foundation row.
Make 1 curl****
Repeat from *** to **** until edging is finished, ending with 1dc into each of last 2 stitches of foundation row.
Variations of a crochet curlicue
This example has quite long curls which are fairly wide apart.
If you want them tighter (more curly) work 4dc into each chain.
If you want them looser, work only 2dc into each chain.
If you want them longer, work more than 10 chain, or for shorter curlicues work less chain stitches.
To have your curls spaced closer or wider apart, work either less or more dc between each on your foundation row.
For finer more delicate curls see instructions for the boa style scarf where smaller stitches and chain spaces are used to make the curls softer and lighter.
You can also make them tighter curled at the tip than at the base by working 4dc into the first chain and then reduce the number of dc into each as you work along the chain.


And if you like these more delicate curls you will probably also like this smaller more dainty version of the traditional crochet bobble
VIDEO TUTORIAL
.
.
.

.
Show off Your Work!
Have you finished crocheting something recently? Tell the world! Publish your work on this website for free
JOIN US AT CROCHET FANATICS ON FACEBOOK


Please note that some links may lead to sites where I will earn a few measly pennies if you use their service. Including some to Amazon.com and Amazon.co.uk
This helps towards the cost of running this site
What's New at How to Crochet Instructions
Would you like to be informed of all the latest free patterns, instructions and other additions to this site?
Enter your details below
Recent Articles
-
Crochet Teddy Comfort Blanket
Jul 06, 23 11:27 AM
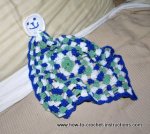 Free crochet instructions. Crochet comfort blanket. Very quick to make
 -
Chevron Crochet Stitch
Jul 04, 23 08:06 AM
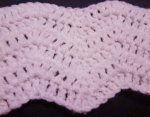 Chevron crochet
 -
Baby blanket crochet patterns - design and make your own
Jun 30, 23 11:22 AM
 Learn how to crochet a baby blanket to your own specifications. Make your own baby blanket crochet patterns
Got a hobby?
turn it from idea to income ....
.
.
